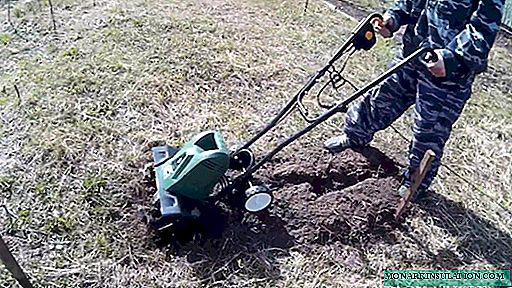
Sometimes it is really more profitable to buy vegetables and fruits in a store. But there is always more confidence in the quality of self-grown products. In addition, work on earth increases vitality, if carried out wisely. But hard physical labor is not always useful, especially for those who are used to working only in the office. To spring troubles were pleasant and not too burdensome, it is necessary to acquire means of small mechanization. Of course, you can buy modern equipment, but it turned out that making, for example, a cultivator with your own hands is quite simple. Make sure of it.
Option # 1: Hand Tornado - Weed Death
Tornado - the so-called manual cultivator, which you can and must do with your own hands. Having such a device resembling curved pitchforks, you can forget about endless battles with weeds. The teeth of the tool are pierced into the ground at an angle, after which the tornado needs to be turned and raised. To do this, you do not have to make excessive efforts, because instead of the usual handle, the Tornado has a lever.

The tornado cultivator attracts by the fact that it is quite simple to use and work with it does not require any significant effort
This wonderful root eliminator is good for everyone, but acquaintance with its store price can completely discourage the desire to become its owner. However, there is nothing complicated in this device. A tornado cultivator can be made independently and even in several different ways.
Spring Steel Tornado
We will need a steel tape 50 cm long, 1-1.5 mm thick and 2 cm wide. For our purpose, it is best to use spring steel. We bend the tape in the form of a loop and attach it to the wooden handle of the tool. The length of the handle is determined depending on the height of the owner: it should be convenient to work with the tool. You can make a lever, the same as that of a store root eliminator. The working steel loop should be 20 cm in diameter, which is slightly less than the row spacing. The edges of the loop are filed on both sides.
Weed - forks to the side
If the tornado is like a pitchfork, then why not make a hand-held cultivator with your own hands from this familiar tool for all gardeners? We will buy ordinary pitchfork in the hardware store and give the teeth of this tool the desired bend with a hammer. In general, the tool should resemble a kind of corkscrew. It is important not to rush and act carefully.
For the lever you will need a half-meter piece of plastic pipe. We buy in the store and a plastic handle-nozzle for the handle, which is used for pitchfork or shovels. We cut the tube lengthwise, put it on the handle and fix it with electrical tape so that it does not slip. Now the resulting lever protrudes about 25 cm from the handle on both sides.

It is logical to make the fork-shaped part of the Tornado from the pitchfork, which is a tool well-known to all gardeners that everyone has

An important part for the tornado cultivator is its upper linkage: thanks to the lever, you can perform heavy work with minimal effort
Option # 2: bike-based plane cutter
The cultivator ploskorez will help to cope with weeds and significantly facilitate the life of any gardener. Structurally, it is more complicated than a tornado, but not by much.
To create a plane cutter you need:
- an old bicycle that no one is using for its intended purpose;
- the head from the damaged cultivator or the working surface of a two-handed saw;
- drill, grinder, keys, drills, bolts and so on.
From the bike frame and one wheel come in handy. The cultivator head is attached to the frame. In the same quality, the cutting part of a two-handed saw, a small plow or steel sharp rods made independently can be used. The handles for controlling the mechanism are made of aluminum or steel pipes. A pipe cut of about 2.5 cm in diameter will come in handy as a transverse jumper.

A plane cutter can be made on the basis of an old bicycle, using as the cutting part the working surface of a two-handed saw, ironically called "Friendship"

There is no particular complexity in the design of this convenient tool, it can be done with the right material at hand
The design must be rigid, so the nodes are pulled together by bolts. A medium-sized wheel should be secured to the frame with locknuts. The result was a homemade cultivator that is very functional and easy to use.
Option # 3: disc rotary cultivator
Do-it-yourself rotary cultivator is not easy. Here we need special skills and good physical preparation. If all of the listed qualities are available, you can try to build this tool, which will be much more effective than all the previous ones. With its help, you can not only cultivate, but also harrow the land, cleverly breaking large clods.

As a part of a disk rotary cultivator: 1 - a disk, 2 - an axis. 3 - sleeve, 4 - large bracket, 5 - small bracket, 6 - rod, 7 - pipe, 8 - handle
The working bodies of this cultivator are convex discs, which must be welded to the bushings worn on the axis. The axial ends are fixed with cotter pins, which are fixed in a large bracket. Then a hole is cut out in the upper part of this bracket. Handles with a crossbeam are fixed in it. A rod 25 cm long and 24 mm in diameter is to be welded to a small bracket. A rod of 16 mm diameter is screwed into it. Part of the rod protrudes above the crossbar.
It is not so easy to give the desired spherical shape to a 4 mm thick disk. To do this, you must be able to cleverly handle the hammer. A strong and accurate blow to the center of the disc converts it into a bowl. And this basic work will require basic physical efforts. Special wing nuts located on the crossbar adjust the angle of inclination of the spherical discs relative to the direction of movement of the cultivator itself.
Option # 4: a production meat grinder to help us
All of the above inventory is quite simple. But in the conditions of our own workshop, you can make a homemade electric cultivator. This proves once again that the possibilities of home masters are almost endless. To implement this idea, you will need an old production meat grinder. On its basis, an effective electric assistant to the gardener will be built.

An electric cultivator can be made on the basis of a meat grinder for industrial purposes: you get a fairly powerful unit that will last several years
Everything is not as complicated as it seems, if there is a welding machine and a master who knows how to use it for its intended purpose. Two corners should be attached to the gear housing. Bend welded pipes to the corners, which will be used as handles. Another piece of pipe is welded between the resulting handles - a spacer that gives the structure the necessary strength.
Axles for the cultivator wheels are also to be welded to the corners. The wheels are selected medium size so that they are easy to use and do not fall into the soil.
The main part of the design is the shaft. Grind it to be from ordinary scrap. The connection is carried out as in the original: in the slot. The nozzle of the meat grinder is chopped off with a sledgehammer, after which there remains a sleeve with thick walls of cast iron. A workpiece carved from scrap is placed in it, to which lugs in the form of a screw are welded. They are cut from automobile springs. Other material options for lugs were used, but they were not viable.
Lugs are located at an angle of 120 degrees. They need to be screwed out in the direction of rotation, then it will be easier for them to enter the ground, and the cultivator itself will be easier to control. The engine of the device is connected according to the "triangle" scheme, the start-up is capacitor. The engine switch for convenience is mounted on the handle of the cultivator. The device will last a long time if, before starting work, lubricate the conjugation of the home-made shaft in the cast-iron sleeve with any used oil.

Take a good look at what the lugs should be and how they should be located: the efficiency of the device and its durability depend on this
The quality of cultivation depends on the speed of movement of such a cultivator. Rapid plowing will be rough, while slow plowing can literally recycle the land to a state of dust.
Option # 5: a child of a bicycle and a washing machine
Do not rush to throw away your old bike and your old washing machine. These things can still come in handy if you want to make a cultivator with your own hands, spending a minimum of money.
Now you know how to make a cultivator yourself. It remains to put their knowledge into practice.