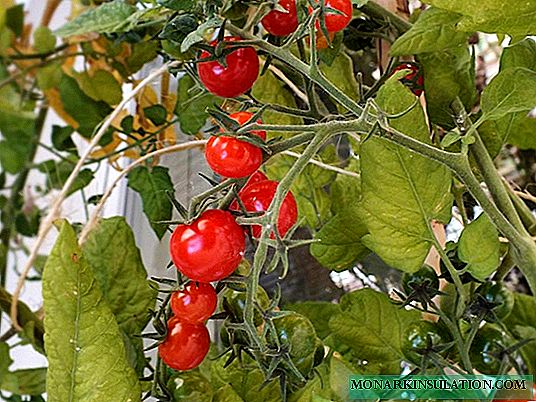
Tomato is an annual self-pollinated plant in the nightshade family. It has a strong root system, propagated by seeds, cuttings and side shoots - stepsons. Fruits are cylindrical or round. In size range from small 50 g to large 800 g.
This plant is grown even in an apartment: on a balcony or window sill. With proper care, a rich harvest is obtained: from one bush 8-9 kg. It is only necessary to step-by-step implement the proposed recommendations.
Dear readers, we want to draw your attention to the fact that sometimes we are found by the query “growing a tomato balcony miracle”. In this article we write in general about tomatoes on the balcony, but about this variety we have a separate article, we recommend reading it.
Features of growing on an open and closed balcony
The best option is a loggia facing the windows to the southeast or southwest. These are the best conditions for the proper development of seedlings and fruit ripening. The north side is not suitable due to lack of light. In the South, on the contrary, there will be too much sun and seedlings will burn.
An open-type balcony is a good solution in the warm season, until the first frosts. The minimum temperature is + 8 ... +10 ° С. Tomatoes do not like drafts, due to gusts of wind, the growth of the bush slows down. Therefore, it is necessary to bring the plants into heat or provide for a screening shield in the form of a screen or closing curtains. And also light stretchers made of thin plywood are suitable. Tomatoes can be brought out onto a loggia of this type not earlier than April-May. When lowering the temperature, do not forget to cover with non-woven material.
Closed (glazed) is suitable even for winter landings. However, the loggia needs to be insulated in order to maintain a comfortable temperature and humidity. Plants should stand so that it is possible to open windows for ventilation.
For any type of balcony, you need to carefully consider the arrangement of pots in order to gain access to each bush. It is better to place heavy tubs on the floor along the wall or closer to the railing. Ampelny tomatoes in pots are suspended at a low height, for ease of watering. Large bushes are attached to plastic trellises, bought in a store. Or homemade: from wooden battens and ropes.
| Air temperature | Daytime | Night time |
| Before flowering | + 22 ... +25 ° С | + 13 ... +15 ° С |
| During fruiting | + 25 ... +28 ° С | + 15 ... +16 ° С |
| Soil temperature | + 17 ... +20 ° С | |
Adjustment is carried out by ventilation. And also be sure to open the windows 2-3 hours after watering. During flowering, an important factor is air humidity not more than 65%.
Grade selection
For small balconies or window sills, stunted and dwarf tomatoes (Kid, Oak) are needed. They differ in juicy fruits and their large number.
A number of reasons for choosing these varieties:
- For planting you need a container of small volume: 3-3.5 liters.
- A small root system absorbs nutrients from the soil better.
- Easy to care for, as the bushes do not require tying.
- Early ripening. The first crop is harvested after 80-95 days.

Many varieties stop growing after brushes with fruits are formed. If there is a desire to grow bushes to decorate the window, cherry tomatoes are ideal, no higher than 40 cm. The fruits are small in weight 15-70 g. They are used for a beautiful serving of dishes or salads. Amount from one bush 1-2 kg. Representatives: Micron, Bonsai.
Often choose standard varieties with a thick erect stem, around which the crown is formed. They have a high yield. The number of fruits on one branch reaches 20 pieces.
To get a big crop, choose tall varieties with a large spreading crown. Representatives: Citizen, Garden Pearl.
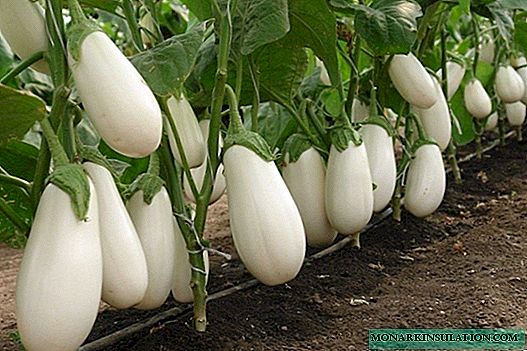
If there is a lot of space, grow bushes with large fruits: Bull’s heart or White filling.
General characteristics of some varieties:
| Grade name | Bush height (cm) and ripening time (days) | Shape, color, taste, fruit weight | Care Features |
| Micro bonsai | 15. 80. | Round red, sweet. | Compact and unpretentious. |
| Garden pearl | 15-20. 85-93. | Red with a raspberry hue, sweet. | It is necessary to tie up. |
| F1 Balcony Red | 30. 85. | Bright red, sweet. | Unpretentious in leaving. |
| Pinocchio | 30. 95-100. | Red spherical, sweet. | Ideal for growing on a windowsill. |
| Balcony duet | 35. 76. | Red, sweet. | The bush does not take up much space. |
| Balcony miracle | 35-45. 90. | Bright red, juicy, sweet. | Easy to care. It does not require tying. |
| Angelica | 50-70. 80-95. | Deep red, sweet. | Not demanding on the formation. Disease treatment required. |
| Red pearl | 50. 85-100. | Bright red, sweet, fleshy. | It does not require pinching. |
| Butterfly | 150. 110-120. | Raspberry red, sweet. | It is necessary to tie up. |
| Ballerina | 150-180. 100-105. | Bright pink, sweet. | It does not require tying. |
| Bonsai tree | 30. 85. | Round red, sweet with sourness. | In leaving unpretentious. |
| Minibel | 40. 82. | Unpretentious to lighting and soil. | |
| Filippok | 40. 94. | Does not need to be tied up. | |
| Balcony Yellow | 45. 100-110. | Round yellow, sweet with sourness. | Compact bush. |
Instructions for planting tomatoes on the balcony
Before planting seeds, it is important to choose the right soil. You can buy a universal substrate for seedlings or tomatoes. It contains the necessary substances and is not affected by any bacteria. Or prepare the soil yourself from peat or sawdust, humus and earth, all components must be taken in 1 part.

Such soil should be disinfected, for this there are a number of ways:
- In the oven - 10 minutes at 200 ° C.
- In the microwave oven - 8-10 minutes at a power of 850 watts. After the procedure, bacterial fertilizers must be applied. For example: Gamair, Alirin.
- Pour with a hot solution of manganese: 5 g per 1 liter of water.
- Another way - in a water bath it takes from 1.5 to 2 hours. An earthen lump is placed on a layer of gauze and, placed in a sieve, steamed over boiling water.
Preparing seeds for sowing
For the first time, it is better to purchase planting material from different companies and varieties to find the right one. When buying, you must pay attention to the expiration date, expired seeds may not germinate. If it is in closed bags, it is already treated for diseases and ready for sowing. Seeds are checked for germination by putting in water. Good ones will fall to the bottom of the tank, while the unusable ones will float.
If planting material is taken from friends or purchased in unpacked bags, it must be disinfected.
There are several ways to do this:
- Using potassium permanganate - soak 1 g per 100 ml of water for 15 minutes.
- A solution of soda - 100 ml 0.5 g to withstand the day.
- Special preparations: Fitosporin. 1 drop of liquid and 0.5 tsp powder per 100 ml of water. Disinfect in the solution for 15 minutes.
After that, you can sow in the ground or pre-germinate. Seeds are wrapped in wet gauze and put in a warm place. When sprouts appear, they are moved to the ground, covered with polyethylene or glass. Watered regularly with warm water, the soil should remain moist.
You can also soak in growth stimulants for 4-6 hours. Epin-Extra accelerates germination and protects against diseases and pests.
Growing seedlings
Sow optimally in late February and early March. If planted in October, then the crop can be harvested in winter.
Prepared seeds are distributed in 2 pieces into disposable cups or plates. You can use plastic bottles, for this they need to cut off the neck. In a temporary container, openings for the outflow of water can be omitted, small sprouts will absorb moisture completely. Deepening more than 2 cm is not recommended. Top must be sprinkled with earth and water.
A prerequisite is ventilation. The covering material is removed for 5-10 minutes daily, increasing the time as the sprouts grow.
Prevention of fungal diseases can be treated with a solution of milk and water: take 50 g per 0.5 l.
A pick is made after the appearance of 3 true leaves. Of the 2 plants in the pot, choose the stronger, pinch the other. Subsequent transshipment of weak sprouts utilize.
Transplantation in a tank for further cultivation
If initially the seeds were sown in small containers, then the volume of the container is increased gradually. First, transplanted into a plastic cup, and then into a permanent pot with a volume of 3-3.5 liters.
First you need to pick up pots, wooden and plastic boxes. At the bottom you need to pour a layer of drainage. You can take pieces of broken tiles or commercial expanded clay. This will avoid stagnation of the fluid and rotting of the roots. At this stage, the presence of holes to remove excess moisture is mandatory.
It is necessary to transplant the sprouts when they reach a height of 10-12 cm, usually this occurs a month after sowing. The soil should be slightly moistened so as not to damage the root system during transfer. In order for the roots to branch better, the longest dive. The earth must not be poured to the top, but three quarters of the volume of the pot. Later soil can be added.
When planting in long boxes, the distance between the bushes should be at least 25 cm.
Young plants are better not to disturb the first week after transplanting, this will help them take root.
Tomato Care
After planting in permanent containers, plants are tied to trellises, poles and cuttings. This helps the bushes not to settle and not break under the weight of the fruit.
For standard varieties, garter is required.
An important condition is a sufficient amount of light. In rainy weather, you can additionally highlight the lamp. Usually use fluorescent, they are suspended at a distance of 30 cm from the tallest plant. Use 2 hours in the morning and the same in the evening. The best imitation of the sun is three pieces: one cold and two warm light.
Unlike counterparts growing in open ground, balcony tomatoes are less likely to be affected by pests. However, they also need careful care and supervision.
One of the most dangerous diseases is late blight. Leaves, fruits and stems are affected, on which dark spots appear. It is necessary to carefully monitor the bushes and at the first signs of the disease isolate the diseased plant. Prevention can be top dressing with a solution of copper, per 1 liter of water for 1 tsp. Another way for half a liter of water is 0.5 g of potassium permanganate and 0.5 tbsp. l pre-crushed garlic.

Features of watering
Watering is partly individual and depends on the internal microclimate on the balcony. But in any case, it is better to spend it in the morning. It is necessary to maintain a balance: do not let the earthen to dry up, but do not flood with water.
Seeds are watered regularly with warm water, the soil should remain moist.
Seedlings frequent watering is not required, enough once a week. Water must be defended, room temperature. If the weather is hot, the period between humidifications is reduced to 2-3 days. At first, it is better to simply spray from the spray gun, so as not to wash the topsoil. When transplanting into permanent pots, you need to water slowly and carefully under the root to wet all layers of the soil.
Feeding
A prerequisite for obtaining a crop is fertilizing with mineral and organic complex fertilizers. For example: Emerald, Fortress, Humate +7.
Of natural remedies, it can be ash, banana peel, egg shells and onion husks. You can gently pour chicken droppings diluted at the rate of 1: 100.
Fertilize should be in several stages:
- The first top dressing 2 weeks after the appearance of sprouts.
- The second in 10 days.
- The third one a week before transplanting seedlings into larger pots. During flowering and fruit ripening, fertilizers are also applied every 10-12 days.
All dressings are made in moist soil. It is necessary to strictly follow the instructions written on the packaging, and for young plants, reduce the indicated amount of the drug by half.
It is important not to overdo it with nitrogen, which affects the powerful formation of foliage and crown. Due to an excess, flowering slows down and the formation of ovaries stops. The taste of the fruit deteriorates and the shelf life is reduced.

Bush formation
As the tomatoes grow, you need to engage in the formation of a bush and perform stepsonovka. This is done for better access to light, the full development of tomatoes. The bush becomes neat, has a well-groomed appearance. Removal of lateral shoots is done manually by pinching, leaving a process in 0.5-1 cm.
Garden tools or scissors are not used to prevent infection.
Dwarf varieties cease to grow after the appearance of 4-5 brushes with fruits and it is no longer necessary to remove the shoots. But for indeterminate ones, even after the appearance of 8-9 brushes, the procedure must be repeated. On cherry varieties, stepsons may not form at all.
Pollination
For balcony tomatoes, regular ventilation is a sufficient condition for pollination. However, the absence of an ovary indicates an improper temperature and humidity level.
| Humidity | % |
| Air | 70 |
| The soil | 60-65 |
Another way to activate pollination is to shake the upper hands. You can try transferring pollen from one flower to another with a toothbrush or brush. Ready-made preparations, for example, Ovary, can also come to the rescue.
At air temperatures above + 33 ... 35 ° C, it is necessary to ventilate and water every evening, otherwise the ovaries will not form.
Harvesting
For better ripening, excess flowers growing near the fruit brushes are removed.
Tomatoes are removed as they ripen; it is undesirable to leave ripe on the bushes. This greatly inhibits the formation of the following ovaries. Better cut when the fruits are just starting to turn pink. If the tomatoes taste sour, they need to lie in the sun for a couple more days.
With the onset of cold weather, unripe tomatoes are removed from the branches and stored in heat until fully ripened. If there is room in the room, the plant is placed on the windowsill.
Mr. Dachnik informs: the possibility of planting a tomato in plastic bottles and the use of hydroponics
The idea of growing upside down appeared in Japan, where they are looking for ways to grow vegetables without large plots of land. Bushes of tomatoes are planted in buckets or plastic bottles so that the root system is on top. The tomato in it grows originally and does not take up much space.
For planting you will need a plastic bottle with a volume of 2-3 liters, in which the lower part is cut. This must be done in a place where the container does not narrow and does not expand. Drill 2-3 holes in the cut-off part with a screwdriver or a drill and insert it back into the bottle, but inverted. Make a few holes around the perimeter in order to stretch the rope and suspend the structure in the future. To make out everything.
Through a cut hole, insert one grown sprout with a small lump of earth and carefully remove the leaves through the neck. In order to prevent the soil from spilling out at first, you can wrap a hole around the sprout with a napkin, thin paper or make a cork of foam rubber.
Fill with earth, leaving a distance equal to the cut-off part, which is inserted back, aligning the holes for hanging. Fasten the rope and hang the container with seedlings.
An even simpler method using a bucket (3-5 l). Make a small hole in the bottom. To prevent the earth from spilling out, take a piece of natural fabric and cut a hole. Insert the sprout through both openings with foliage down and pour in the ground. Hang the bucket on a hook purchased at a hardware store.
Hydroponic method - allows you to grow vegetables, even without a land plot. You only need to purchase the appropriate equipment. You can buy it on the Internet or make it yourself. Instead of land, a specialized substrate is used.To accelerate ripening, it is necessary to organize an irrigation system. Bushes need tying and pollination with a brush.
Probable mistakes when growing tomatoes on the balcony
When all conditions are met, the bushes develop correctly, the ovaries form and the fruits ripen. If something is done incorrectly, the plant necessarily signals a problem.
Here are some common mistakes:
- If the seeds are sown too early, seedlings can die without receiving the right amount of sunlight.
- With excessive watering, a strong stretching of the stem, rotting of the root system, and damage by a fungus are possible.
- Lack of light negatively affects growth and development. The stalk becomes thin, the leaves turn pale. Disease resistance is reduced.
- Too hot air, low humidity will make the bushes sluggish, and the foliage yellow.
- The lack of nutrients in the soil leads to improper formation or death of the ovaries, the painful appearance of the plant.
- Close pots or frequent planting in boxes to weave roots, lack of nutrients. Fruits will not ripen well due to excessive shading.
A careful study of the growing process, the exact observance of all conditions will help minimize errors. The plant will have a neat appearance, will be a wonderful decoration of the window and will thank an abundant and tasty harvest of environmentally friendly tomatoes.